 We’ve covered Shovel Knight here before I believe… Ah! Yep, here it is. A fine review, for all intents and purposes.
Now, by the time our review of Shovel Knight hit our site’s homepage, I had long since forgotten about a review copy I’d requested many moons ago, so as you can probably expect, I was delighted to find a review code in my inbox a few weeks ago. I’ve heard nothing but the highest of praise since Shovel Knight came out, so I was excited to sink my thumbs into it. I was nervous, yes, because I’m generally no good at these super challenging games. I’m a big man child, and I don’t want to be challenged. I want to have fun and, surprisingly enough, Shovel Knight struck an incredible balance between challenge and fun that completely captivated me from the second my shaky WiFi finished downloading it into my 3DS. How is it on 3DS as opposed to PC? Definitely better in my opinion. I’m a fan of 3D, I’m a fan of the 3DS directional pad, and I’m a fan of being able to take my games with me, so the 3DS version is definitely my personal favorite way to play this particular game. So, yeah, consider this my brief and succinct review for the 3DS version of Shovel Knight. It’s really good and you should definitely give it a look.
After beating the game, I found myself chasing down feats. It’s a fine quest, and definitely one you’ll be going on at some point in your Shovel Knight adventure. Some feats are easy, some of them are mind-bogglingly difficult, and we’re going to walk you through how to get all of them right now. Get ready for the Shovel Knight Feats Guide, otherwise known as the Shovel Knight Walkthrough Sans Handholding.
[divider]Victory! – You get this one just for beating the game. First time around, I had over 100 total deaths, so trust me, there are no arbitrary requirements. Beat the game, get this feat. Simple as that.
Music Lover – Detailing where to get all of the song scrolls would require an entirely different guide, and you can find a great one by following this link. If you really wanted to, you could get all of these on your first playthrough, but I recommend discovering as many as possible on your own at first. It’s really fun, and you’ll knock out quite a few if you look for breakable walls. When you complete the game for the first time before starting New Game+, you can take advantage of that guide to finish things up before New Game+ makes the game much more difficult. The Song Scrolls are often hidden in dangerous rooms, so you’re going to want to round them up before New Game+ gets rid of a ton of your check points and wall chickens.
 Master Angler – Keep an eye out for sparkling areas in pits of death. After you’ve obtained the Fishing Rod from Chester in the Village’s basement, you’ll be able to fish in these spots and reel in a special fish worth either 350 gold or an on-the-spot refill of Ichor.
Decked Out – Buy EVERYTHING. Collect all of the relics (another stretch of completion that merits its own guide), buy every set of armor, buy all three shovel upgrades and max out your health and mana at 10 orbs and 100 points respectively. This takes a considerable amount of gold, and some of the Meal Tickets are obtained by beating bosses, so take your time and complete this at your own pace. Definitely buy everything before advancing to New Game+, though. It will save you quite a bit of time if you’re planning on getting all 45 Feats.
Relic Roundtable – Collect all of the relics you’d need for Decked Out and you’ve already done the hard part of this one. Kill something with each relic (including the Fishing Rod, but excluding your chalices) and you’re done. The Fishing Rod isn’t the most effective weapon, but if you hit an enemy with it, it’ll die, so just keep trying. It’s weird.
I Scream for Ichor – Try each variety of Ichor. I personally only used the Red Ichor in my journeys, so you may not get this one automatically, but since Ichor is free, just visit the Troupple King and sample his various beverages. Easy as could be.
Nice Hat – To the far left side of the Armor Outpost, you’ll find a bunch of posh beggars asking for 1000 gold each. Get yourself ready for a boss fight and start doling out your money. You’ll fight Mr. Hat and the Feat is yours. Not a particularly hard boss fight. Definitely get this done before you begin New Game+.
Reflect Lord – Most projectiles fired by enemies can be reflected back at them with a well-timed shovel swing. This includes The Black Knight and the mages wearing red robes. Give them a taste of their own medicine 30 times and this Feat is yours. (No, not 30 times in a row. This is cumulative.)
Again! – Finish New Game+, but MAKE SURE you’ve read this in its entirety. To make the most of your first playthrough, there are several Feats you should get before continuing on. New Game+ has fewer checkpoints and healing items, so be patient and you’ll get it eventually. Believe it or not, it gets harder.
Hall Champion – Pay the 5,000 gold fee and complete the Hall of Champions. To do this, you must turn on all the lights by defeating the ghosts within by hitting them with the orbs of light scattered throughout the level. Make sure to keep an eye out for breakable walls, the ghosts are hiding in there too. After you turn all the lights on, you’ll fight a ghost boss with similar mechanics and you’re done!
Well Met – Generally, if you see something moving around the map, go to it and kill/collect it. You’ll eventually defeat all the Wandering Travelers, these fun little side-bosses, and this Feat will be yours.
Halfway – Complete 4 Order of No Quarter levels and defeat the Knights at the end of them. You’ll get this as you complete the game.
Hey Big Spender – Spend 25,000 gold. This is a no-brainer, and it’ll happen well before you’re done buying everything in your first playthrough.
No Damage! – Beat a level without taking a scratch of damage. The Plains counts for this, but if another level would be easier for you, go for it.
 Impossible! – Finish the game without dying. If you die, quit to map and it won’t save your death. Just imagine that all of the checkpoints are gone and you can imagine how difficult this is.
Penny Pincher – If you bought everything in your first playthrough, you should get this when you complete New Game+ because there’s not much left to spend money on. Just be careful not to accidentally buy anything and you’ll be fine.
Perfect Platformer – If you complete the game without dying, you’ll obviously complete the game without dying from a fall into a bottomless pit. This Feat goes hand-in-hand with Impossible!, so you should get them both at the same time.
Checkpointless – Same deal. If you beat the game without dying, you don’t need checkpoints, so make sure to destroy all possible checkpoints and you’ll get this one when you complete your no-death run of the game.
First Purchase – Buy something.
Master Shoveler – You’ll get this as you buy upgrades for Decked Out, so don’t worry too much about this. It’ll come.
Flare Wander – Get the Flare Wand and the Propeller Dagger. Go to The Plains. Fire your Flare Wand. Use your Propeller Dagger to chase the projectile until it hits a bad guy. Easy as pie, just takes some preparation.
Another Dimension – You’ll probably get this when you complete the Forest of Phasing. Don’t jump around too much as you do that, just spam the Phase Locket and you should get this one, but if you don’t, just wait until you have a good stash of gold, kill yourself on some spikes, and use the Phase Locket to collect your money back.
Super Sphere – In the Explodatorium, where you get the Alchemy Coin, there are a bunch of enemies along the bottom of the room. Spam your Chaos Spheres and this Feat is all yours.
Knuckle Down – There’s a spot in the Knuckler’s Quarry where there are a few dust block in a row, a slight drop, and then another row of dust blocks. Time it correctly with the Dust Knuckles and you should be able to get this really easily. If you mess it up, restart the level, because if you revisit it, you won’t be able to get this one.
Reflected Riches – This one is easy. Get the Alchemy Coin from the Explodatorium and go back to the Lich Yard. Find one of those weird bouncy green things and toss your Alchemy Coin at it. It’ll bounce back at you, so just hit it with your shovel and keep the volley going until you get this Feat.
Arc of Iron – Near the end of Stranded Ship, there are three enemies on adjacent ropes. Line them up just right and clear them with one Throwing Anchor and this is all yours.
 Flying Feat – There’s a spot in Pridemoor Keep where a bunch of Propeller Rats make a path up to a secret area. Bring your Propeller Dagger and kill them all with it without touching the ground. If you mess up, just leave the screen and come back. It’ll reset the enemies.
Boom! – Several opportunities to do this present themselves, especially later in the game. There are a couple good spots to do this, but if you’re any good a leading Propeller Rats around, you should be able to set this up in a ton of different places. Works especially well if you can draw some Propeller Rats near a couple of ground-based baddies.
Clearing a Path – See the above Feat Super Sphere. The same spot and same method works, just make sure to use only one Mobile Gear and stay with it until it squashes enough enemies.
I’m Alive! – You’ll probably knock this out on accident. Figure out which stage is easiest and lowest-risk for you and beat it without eating endless void or boss attack. No deaths and you get a Feat. If you die, just restart.
True Shovelry – Don’t get any Relics at all. No cups, no Fishing Rod. Goes well with Hurry Up! since finding and buying Relics takes time you don’t have.
Hurry Up! – Just move your armor-clad buns like never before. This is best attempted alongside True Shovelry on a second or third non-New Game+ playthrough. You will really want the extra checkpoints. Get to know the game really well, don’t stop to dig up piles or explore secret areas, and limit yourself to one or two deaths per level. This is a tough one, and probably the hardest to get, but you can do it.
Order of Hoarders – If you bought everything on your first playthrough (which you should’ve, darn it), this will come pretty easily on your second playthrough.
Get the Point – Pridemoor Keep is the easiest level for me, personally, and since it’s one of the first levels with destructible checkpoints, it’s a great place to pull this off. Break all those checkpoints and beat the level. Takes more patience than skill, but it helps to know the game really well, so this is a good one to pick up after beating the game but before starting New Game+.
Untouched – This one is a little tough, but again, King Knight is great for this. Really predictable moves. Just don’t take a hit during the boss fight. If you do, just restart or kill yourself if you don’t want to replay the level.
Shovel Economy – Wait until you get the Dust Knuckles and just don’t swing your shovel for a level. You’re fine to swing it a few times in a pinch, but keep it under 20. Shovel bounces are fine, and this works on the Plains, so not a difficult achievement to get if you have the right Relic.
 On a Diet – Avoid food. Beat a level. You can do this on the Plains, so it’s easy peasy. It’s fairly easy to get food without realizing, so if you don’t get it, try again. I believe in you.
Sparker – Get the spark shovel upgrade. Grab two shots of Red Ichor. Go to the Plains. Whittle The Black Knight down to a sliver of health, pop an Ichor if you need to, and focus on hitting him with the spark. Bazowski, you get a Feat. (This also works with other Knights, and if you’re like me, King Knight is actually the easiest, so try him if you’re so inclined.)
You’re Fired – Go back to that same boss fight, get The Black Knight back down to a sliver of health, and wait for him to shoot his purple craziness at you. Reflect it by hitting it with your shovel, and be prepared for him to hit it back, because there’s a decent chance this will happen.
Pungent – Go to the Village basement and talk to the frog in the left portion until this Feat is obtained. His jokes are groan-inducing, but good for a chuckle, so if you’re not in a hurry, read through them.
Juggler – In the right portion of the Village Basement, you’ll find some sort of depressed scholar who’ll offer a minigame. It just takes practice to get the required score of 150.
Dirt Poor – This is annoying. Basically, pick a level and be super careful not to nab any currency. Make a note of your gold balance when you go in and check on it regularly to make sure you didn’t accidentally collect anything. If you do, just restart.
Hooper – This takes a little practice, but it’s fun. In the right above-ground portion of the Village, there’s a child playing hoop n’ stick. Shovel bounce on the hoop for 5 consecutive seconds, but be careful. The side you bounce on determines what direction it moves in, so if you slip over the vertical halfway mark, it’ll go flying backwards, and there’s no recovering from that. You’ll get a feel for it after a couple tries.
Troupple Acolyte – Go to the Troupple King. He lives on the square with the apple, and he’ll fill up your Ichor chalices.
Only You – At several points in the game, you’ll find yourself at a campfire. Dig that junk right up, prevent forest fires, appease Smoky, and get a Feat. That’s a win-win-win-win situation right there.
[divider]This is a struggle, but if you have patience, you can do this. Eventually. I promise.
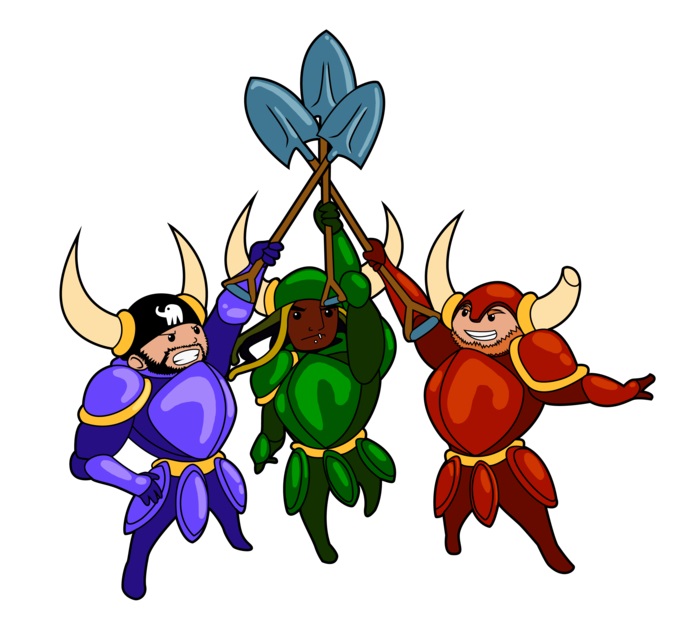


[…] of Yacht Club Games, the folks behind crowdfunded juggernaut, Shovel Knight, Puzzle Depot will now feature a cameo from Tinker Knight. He comes complete with his own level […]